The Admin Dashboard
The Admin Dashboard is the central hub of the system, providing an overview of all bookings and tours. It allows your team to manage bookings, tours, and view reports. When logging in to the system, you will find a navigation item on the right side for FWT Bookings. Under this item, you will find the relevant pages and functionalities for managing the system. 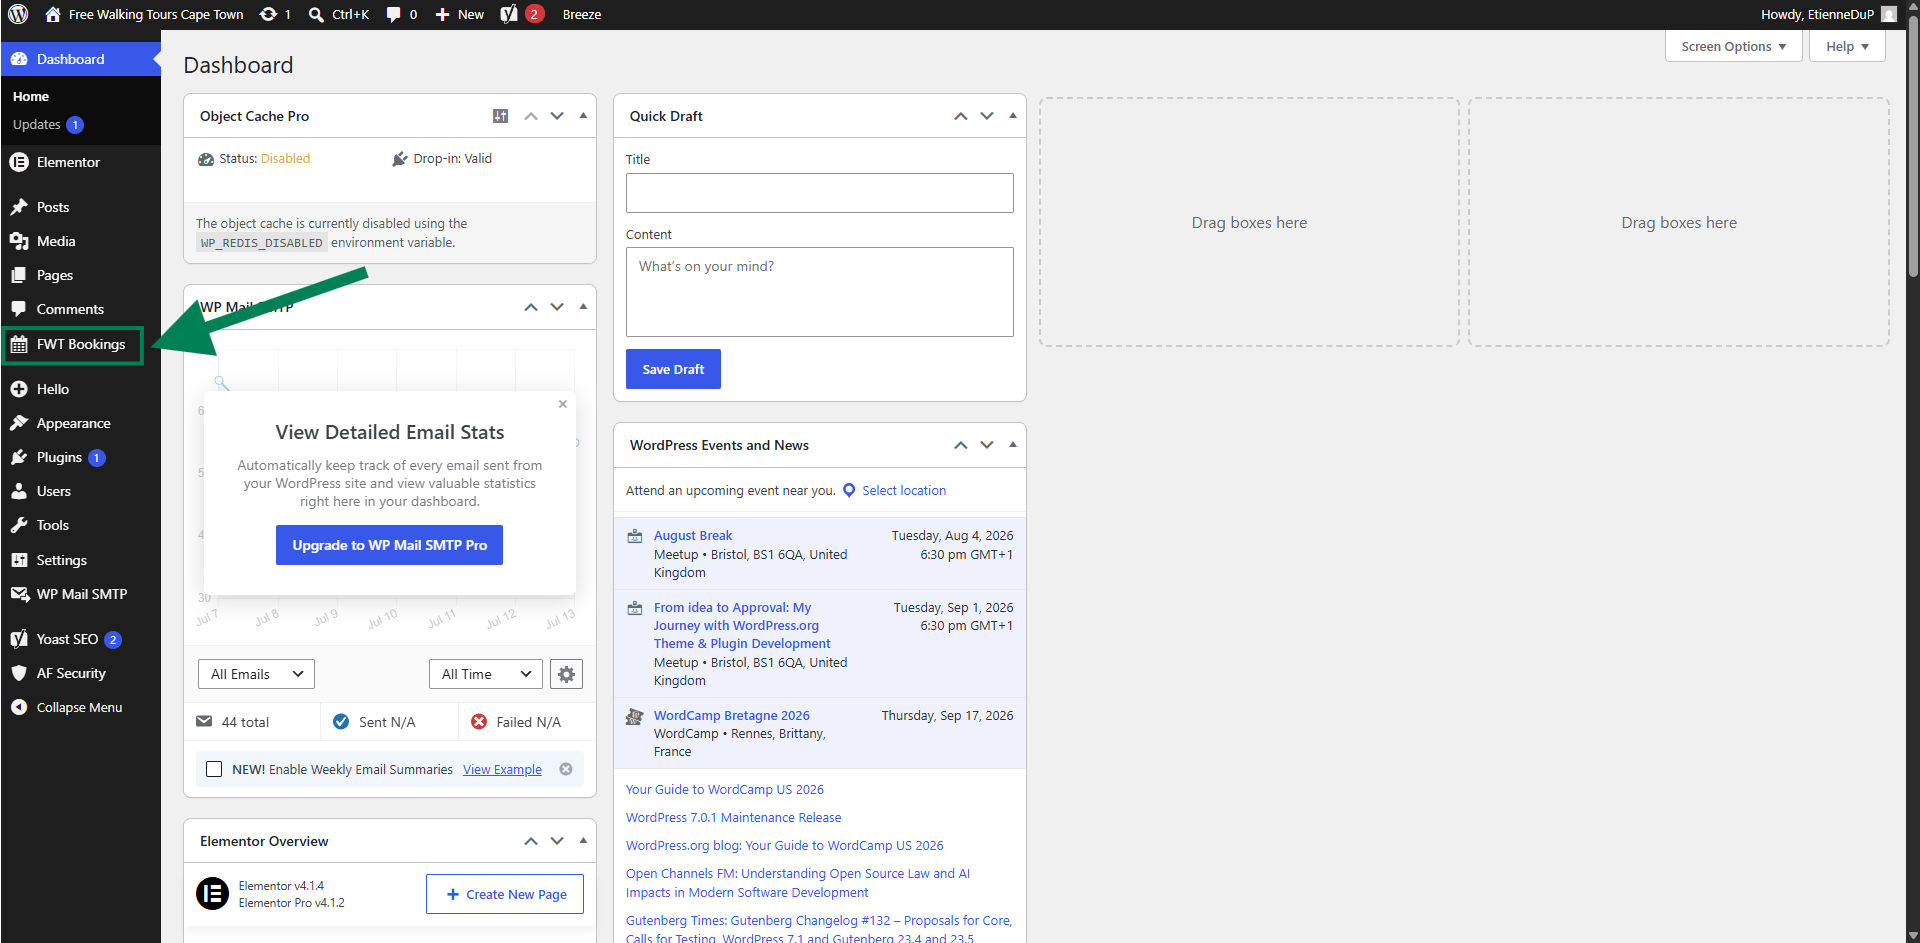
By clicking on this page, you will be presented with your overview dashboard. 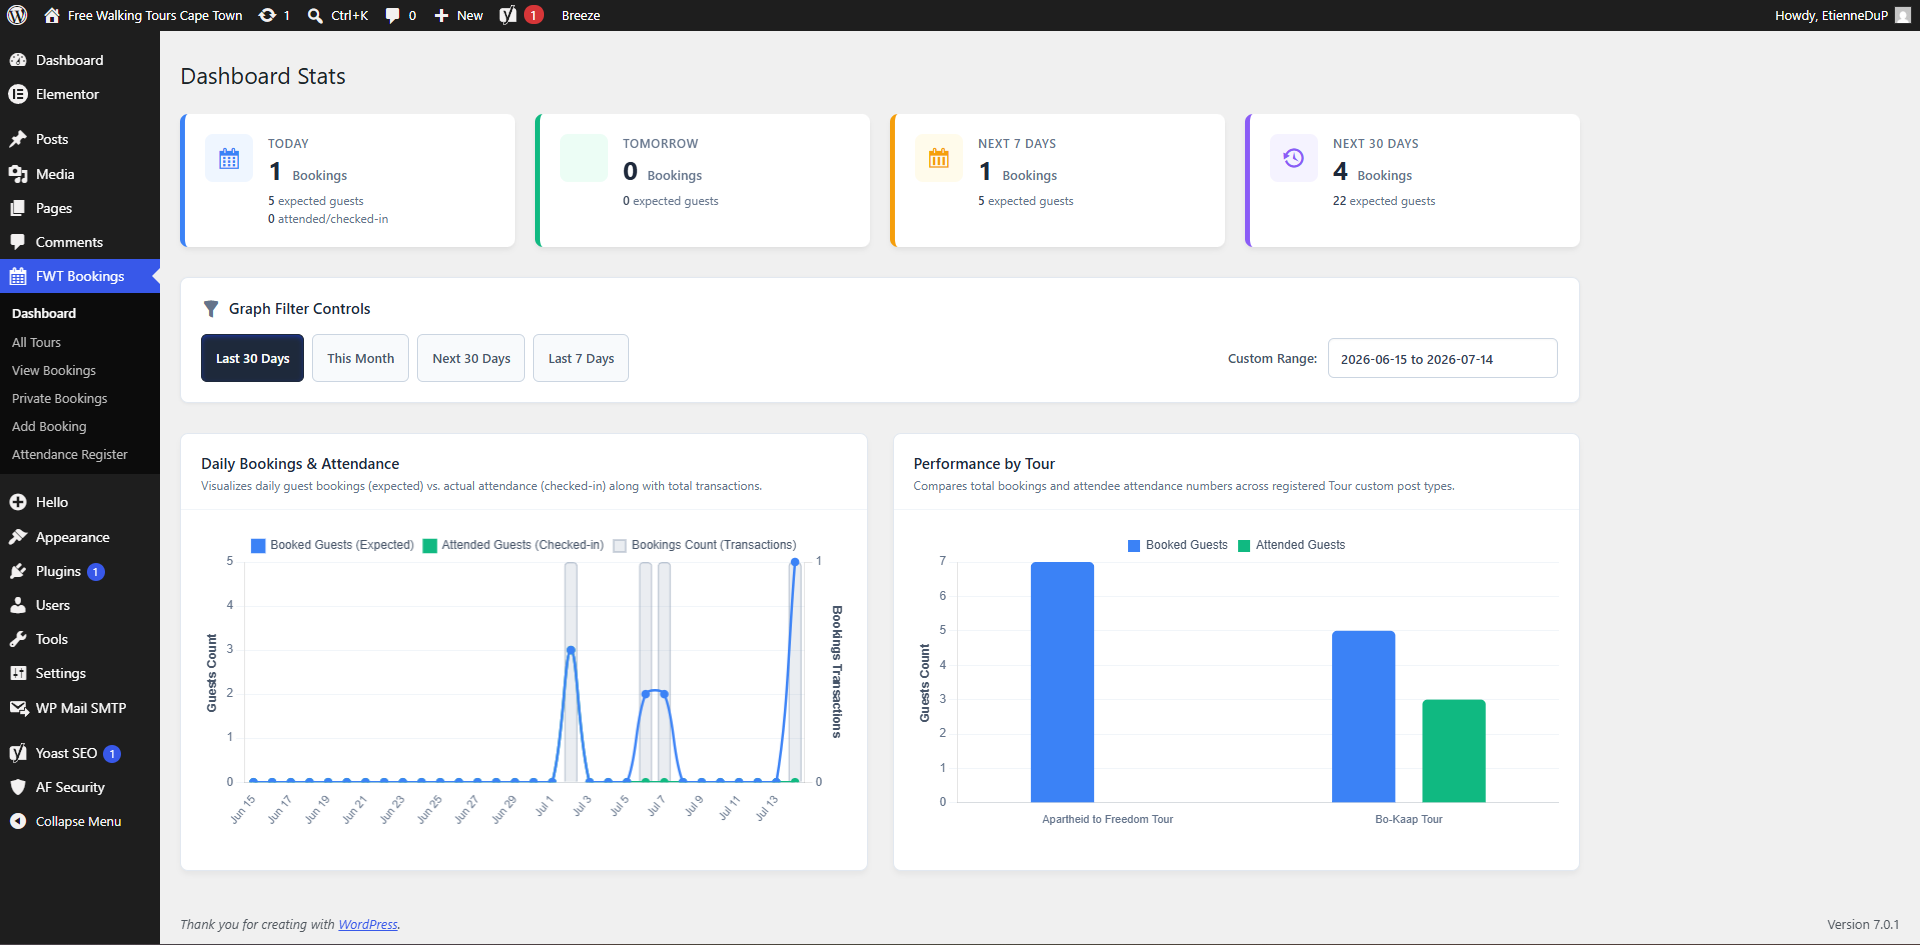
Within the sidebar, you will now find the relevant pages and functionalities for managing bookings and tours.
Starting from the top,
Dashboard - Overview with your reports
All Tours - Manage your tours and their time slots.
View Bookings - Manage your bookings.
Private Bookings - Manage your private bookings.
Add Booking - Add a new booking.
Attendance Register - Manage the attendance register for your tours.
1. Dashboard
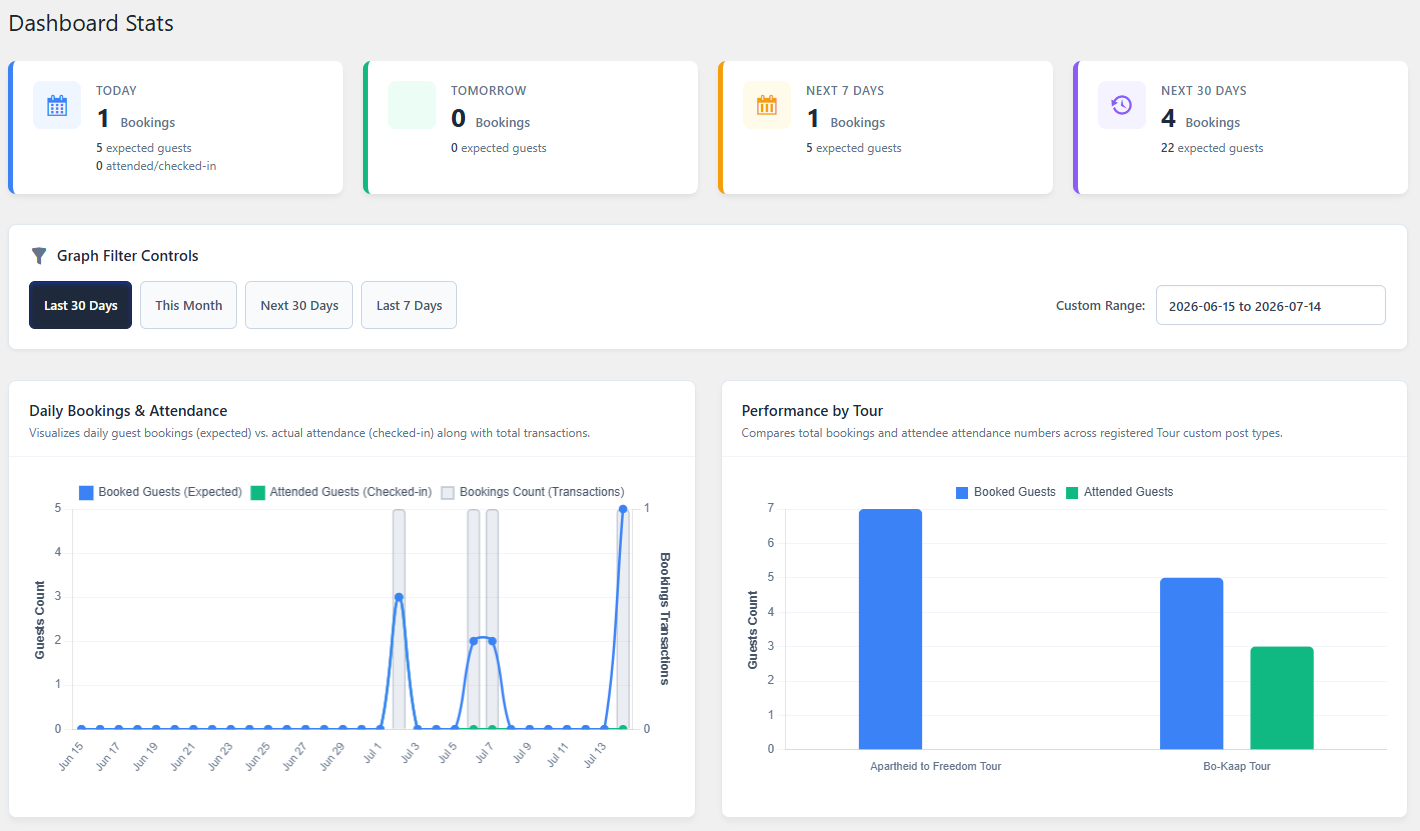
The Dashboard provides an overview of your bookings and tours, including reports and statistics. You will find key metrics such as your bookings for today, tomorrow, next 7 days and the next 30 days.
The graphs can be filtered by preset date ranges, or by using the custom range selector.
Graphs
There are 2 graphs for you to view and analyze your bookings and tours.
The first is your Booking and Attendance by day. 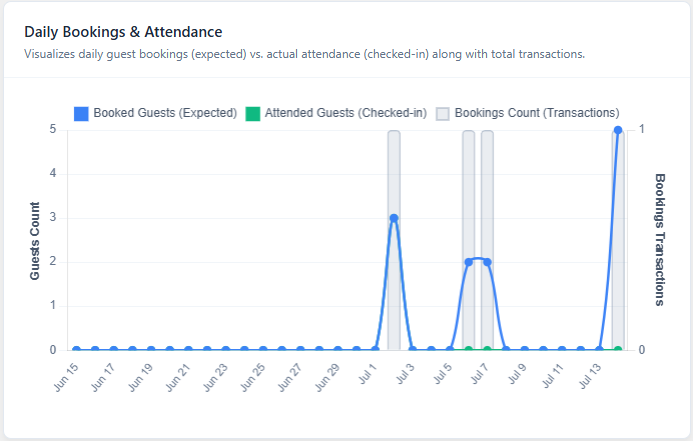
On the left you have " Guest Count " which represents the number of guests who have booked or attended a tour on a specific day.
On the right you have " Booking Transactions " which represents the number of bookings that have been made a specific day.
The way to read this graph is a 3-point process:The blue line represents the number of guest booked - this is calculated by the number of "Adults" and "Children" submitted during a booking form submission by a guest.
The green line represents the number of guest attended - this is calculated by the number of "Adults" and "Children" submitted during a booking attendance registration by your tour guides.
The gray bar represents the number of bookings that have been made.
The second graph represents the number of booked and attended guests for tours.
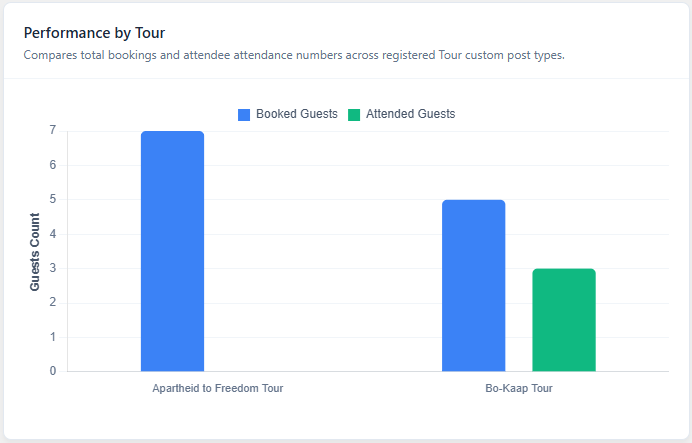
2. All Tours
On this page, you can create, manage and delete tours.
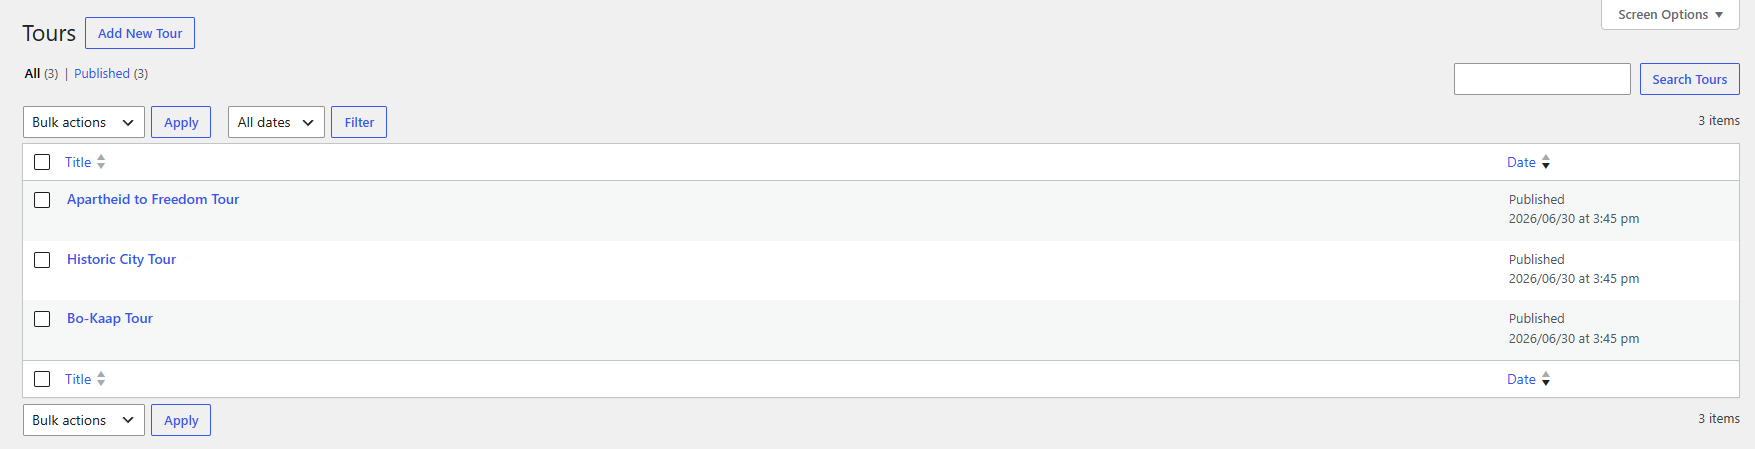
Hovering over a row will give you access to quick actions for that tour.

Adding a Tour
To add a tour, you can click the Add New Tour button at the top of the page. You will be taken to the tour creation page where you can fill in the details of the tour.

Here you can give your tour a name, and add time slots. These fields are what will show up in the booking system when a guest is filling in the booking form.
Add title - Put the title of your tour here.
Time Slots - Input time in the format of "HH:MM" (Hours : Minutes). This is a simple value display and is shown on the booking form as is.
You can add multiple time slots by clicking the Add Time Slot button.
Once you are done, click the Publish button to save your tour.
Editing Tours works the same way. You can edit the title and time slots of a tour by clicking the Edit button in the quick actions menu.
3. View and Add Bookings
This section covers the View Bookings, Private Bookings, Add Booking pages.
Here you can view all the bookings made for your tours.
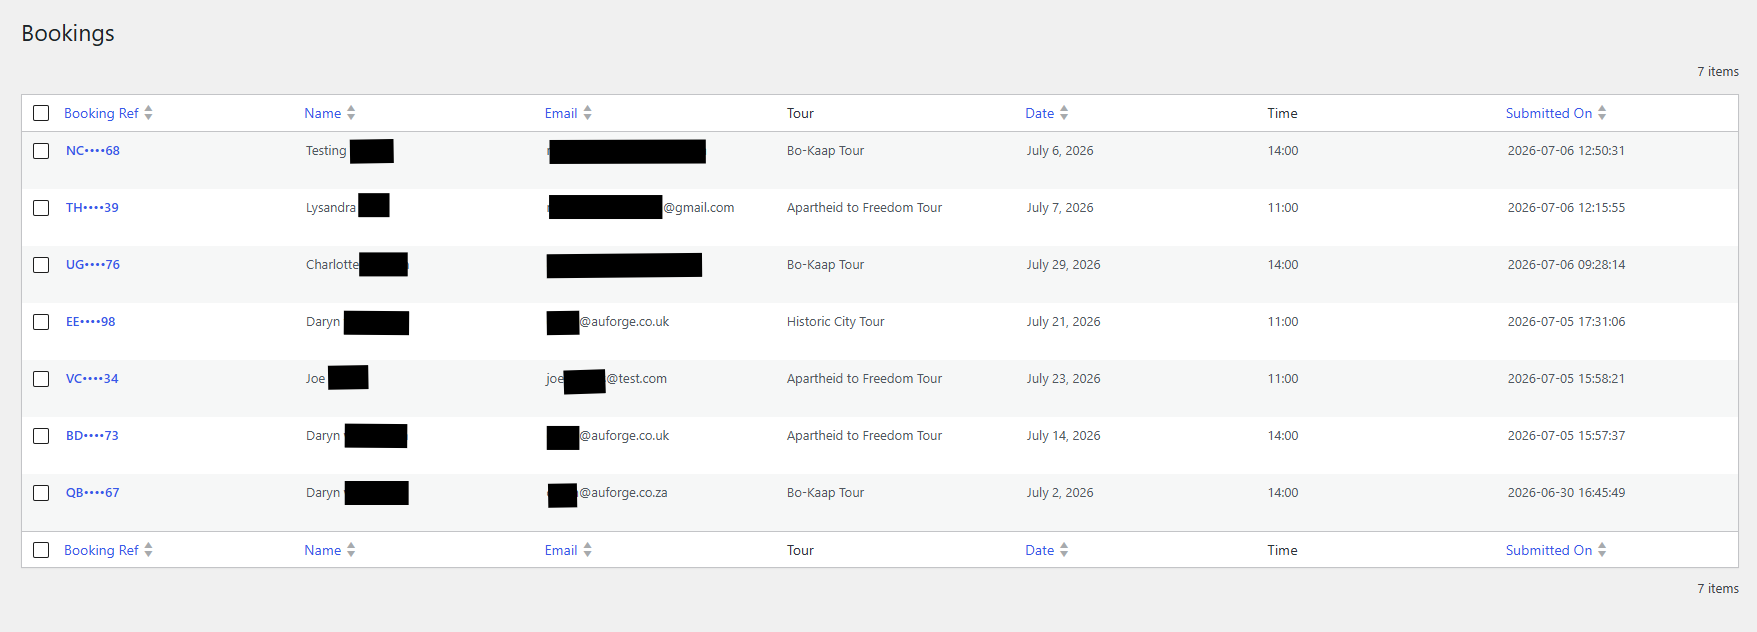
You can click on a Booking Reference to view more details about the booking.
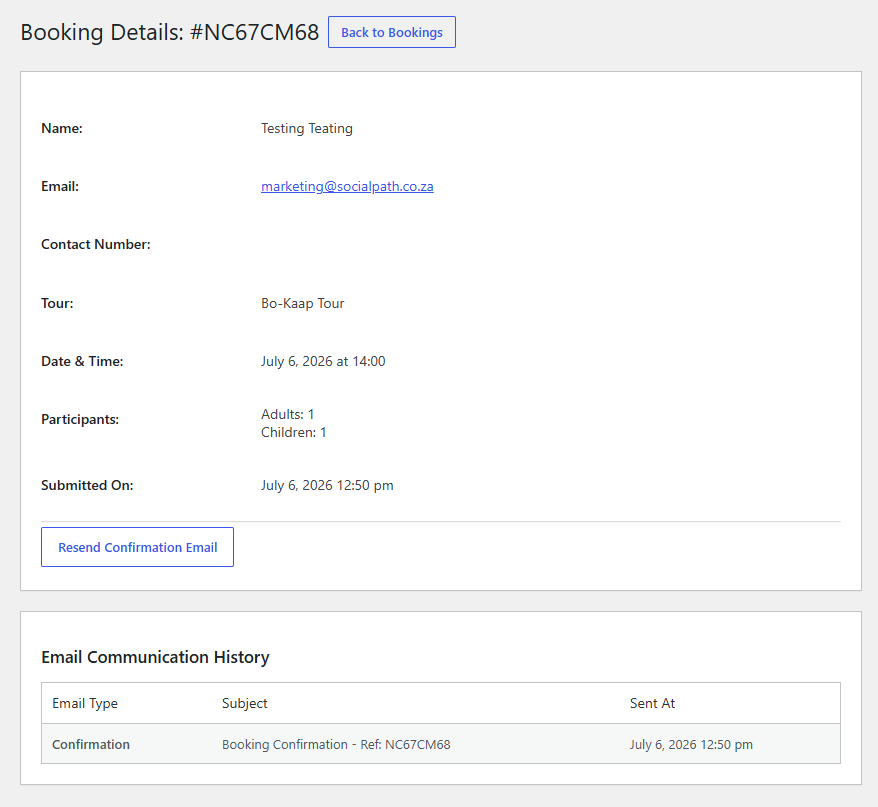
Here you can view all the details of a booking, including the guest's name, email, phone number, and booking reference. You can also resend the confirmation email to the guest by clicking the Resend Confirmation Email button. If the guest has attended the tour, you can also resend a thank you email by clicking the Send Thank You Email button.
Under the booking details, you can view the email history, including the confirmation email and any thank you emails sent to the guest.
4. Attendance Register
This is the core of your booking management system. Here you can view and manage the attendance of your guests for each tour. 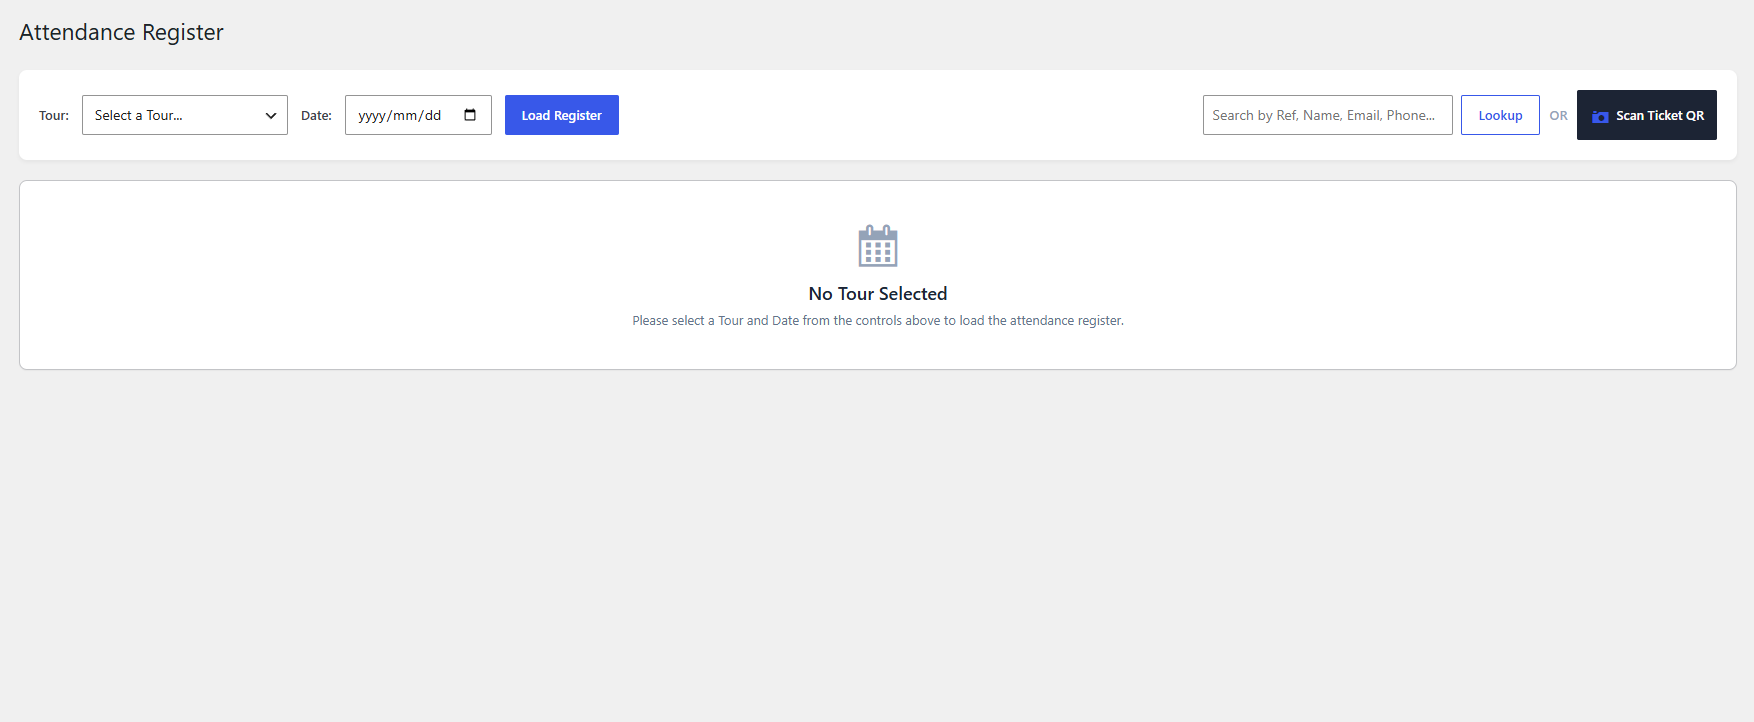
It may seem daunting at first, but it's actually quite simple. 
Select your Tour from the dropdown
Select the date of the tour
Click "Load Register"
This will load up the attendance register for the selected tour and date. 
In the table, you will see a list of all the guests who have booked the tour. You can mark a guest as attended by clicking the green Attended button on the far right. You can also mark a guest as unattended by clicking the Unmark button.
You can also lookup a booking via the search bar or via the "Scan Ticket QR" button.

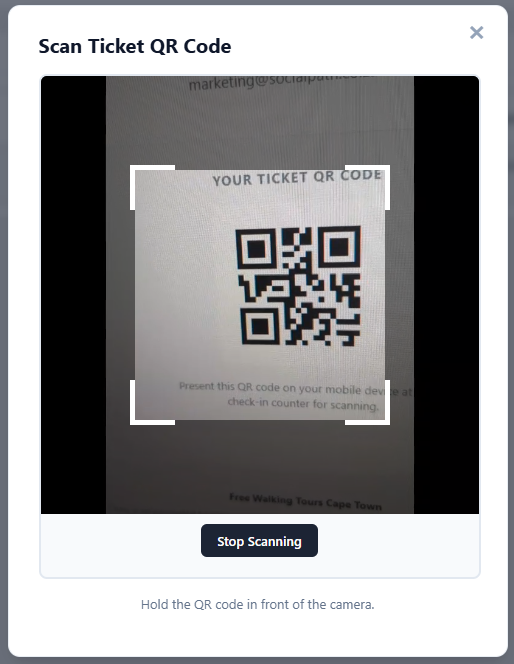
These 2 options will open up the booking details popup. 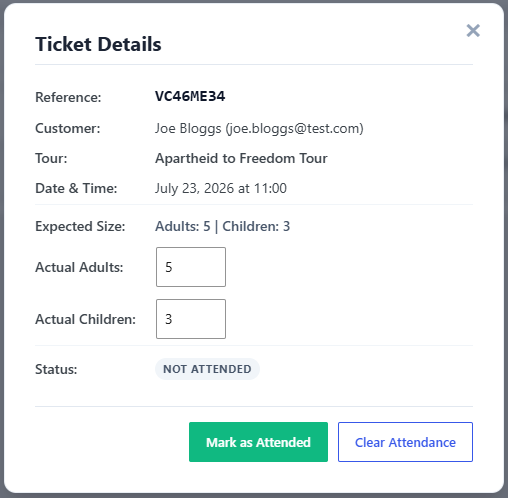
From here, you can also adjust the actual attendees and mark the guest as having attended the tour.